A faulty limit switch on your garage door may be to blame. Learn how to troubleshoot the issue safely and effectively.
The limit switch on a garage door is a key element of your garage door opener. It tells the opener when to stop running the motor, preventing your door from going too far up or down. If the switch is misaligned, malfunctioning, or damaged, it can cause the door to stop prematurely or not, leading to frustrating or unsafe situations.

The limit switch can typically be found on the opener’s motor track. Depending on the model, there may be two switches: one for the upper limit and one for the lower limit. Adjusting or replacing a faulty switch can resolve common issues with garage door movement.
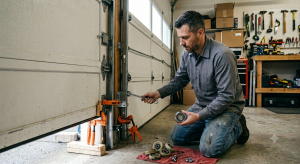
Before attempting any repair, understanding the mechanics of the limit switch on your garage door can help you determine whether it’s something you can safely adjust yourself or if you need a professional technician.
Common Signs of a Faulty Garage Door Limit Switch
A garage door limit switch controls how far the door travels when opening or closing. When it starts to malfunction, your garage door may behave unpredictably. Recognizing the signs early can help you avoid further damage and keep your system working efficiently.
- Incomplete Opening or Closing
The garage door may not fully open or close. You might notice a gap at the bottom when it closes, or it might stop short of opening completely.
- Reversal During Operation
The door may suddenly reverse direction midway through opening or closing. This unexpected behavior is often a clear sign of a limit switch issue.
- Continuous Motor Operation
The motor keeps running even after the door has reached its fully open or closed position. This puts unnecessary strain on the system and can lead to motor damage.
- Harsh or Abrupt Movements
The door may slam shut too forcefully or stop abruptly before fully closing. These jerky movements suggest the door isn’t receiving the correct limit signals.
- Straining or Unusual Noises
You may hear strange or loud noises from the opener. The motor is also struggling to move the door, even with no visible obstruction.
If you see these issues, avoid repeated operations to prevent wear on your system. Begin the troubleshooting process to isolate the problem.
Troubleshooting the Limit Switch on Garage Door Openers
If your garage door does not open or close correctly or the motor continues running after the door has stopped, the limit switch may be misaligned, damaged, or need adjustment. The limit switch is a vital component that tells the opener when to stop moving the door. Troubleshooting it correctly can help restore normal operation and prevent damage to the motor, tracks, or door.
Step 1: Disconnect Power

Before beginning any repairs or inspections, always disconnect the power to the garage door opener. This can typically be done by unplugging the unit from the ceiling power outlet or turning off the corresponding breaker in your electrical panel. Disconnecting the power ensures your safety by preventing accidental door activation while working near moving parts or electrical components.
Tip: If your garage door opener is hardwired and has no plug, locate the circuit breaker and turn it off. Never attempt any adjustments while the system is powered.
Step 2: Locate the Limit Switches
Once the power is off, identify the limit switches on your specific opener model. Most garage door openers have two limit switches—one for the up (open) direction and one for the down (close) direction. These are usually found:
- Near the motor housing, mounted along a rail or track
- Attached to the chain or screw drive mechanism
- As adjustable dials or screws labeled “Up” and “Down”
If unsure, refer to your garage door opener’s user manual for an exact diagram. The design and location may vary depending on the brand and model.
Step 3: Inspect for Physical Damage
With the limit switches located, visually inspect them and the surrounding components for signs of wear or damage. Common issues to look for include:
- Frayed or disconnected wires
- Corroded terminals or contacts
- Cracked plastic housings
- Loose mounting hardware
- Dust or debris interfering with the switches
Any physical damage or signs of corrosion may require replacing the switch entirely. Ensure all connections are clean, tight, and free of rust or buildup.
Step 4: Adjust the Limit Screws
If the garage door is stopping too early, slamming shut, or running longer than it should, the limit screws likely need to be adjusted. Here’s how to do it:
- Use a flathead screwdriver to turn the screws labeled “Up” or “Down.”
- To extend the door’s closing distance, turn the “Down” screw clockwise in small increments.
- To allow the door to open further, turn the “Up” screw clockwise in small steps.
Important: Make only minor adjustments—about a quarter turn at a time. After each adjustment, reconnect the power and test the door’s movement to avoid over-adjusting. Repeat the process until the door opens and closes smoothly and completely.
Step 5: Check for Sensor Interference

Sometimes what appears to be a limit switch issue is caused by a problem with the safety sensors. These sensors are typically located near the bottom of the garage door tracks on either side. They create an invisible beam that, when interrupted, prevents the door from closing to avoid injury or damage.
Make sure the sensors are:
- Properly aligned with each other
- Clean and free from dust, cobwebs, or dirt
- Not blocked by objects like tools, bicycles, or trash bins
- Showing a steady indicator light (usually green or amber when aligned)
Misaligned or dirty sensors can cause the door to stop or reverse, which may mimic limit switch failure.
Step 6: Reconnect Power and Test Operation
After you’ve made your adjustments or repairs, it’s time to reconnect power to the garage door opener. Plug the unit back in or switch the breaker back on. Then:
- Operate the door using the wall control or remote
- Observe the full cycle of opening and closing
- Listen for unusual sounds or signs of straining
- Watch for smooth, complete movement to the fully open and closed positions
If the door still doesn’t move correctly or the motor continues running after the door stops, additional fine-tuning or part replacement may be needed.
When to Call a Professional Garage Door Technician
While homeowners can adjust a small limit switch, other issues may require expert service. Contact a professional if:
- You notice frayed wires or burned components
- Your adjustments don’t solve the problem
- The door behaves erratically after a reset
- You’re unsure how to proceed with electrical components safely
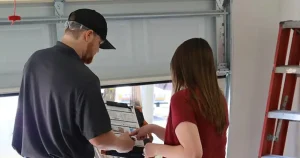
Garage door systems operate under extreme tension and feature powerful components that can be hazardous without proper knowledge and tools. If you’re unsure about tackling repairs yourself, it’s best to leave it to the experts. Royale Garage Door Service Inc. offers professional, high-quality service backed by skilled technicians who prioritize safety, efficiency, and exceptional workmanship on every job.
Frequently Asked Questions
Where is the garage door limit switch located?
The garage door limit switch is usually located on the garage door opener’s motor unit, often near the track where the trolley stops. It can be adjusted manually with knobs or screws labeled “up” and “down” to set how far the door travels.
What is the limit switch on a garage door?
The limit switch on a garage door tells the opener when to stop moving the door up or down. It prevents the door from opening too far or closing too hard into the floor.
How do I reset my garage door limit switch?
To reset the limit switch, locate the adjustment screws on the motor unit—typically labeled “up” and “down.” Turn them slightly in small increments and test the door’s travel until it opens and closes at the correct positions.
What triggers a limit switch?
A limit switch is triggered when a mechanical part, like the garage door trolley, reaches a certain position. This action activates the switch to stop or reverse the motor’s direction.
What is the purpose of a limit switch?
A limit switch controls the garage door’s start and stop points. It helps ensure the door operates safely and doesn’t overrun its intended travel limits.
Conclusion
The limit switch on your garage door may be small, but it is vital in ensuring your door operates correctly and safely. When malfunctioning, it disrupts the entire system, causing excessive or insufficient movement.
Whether you’re dealing with a door that won’t fully close or a motor that won’t stop running, proper troubleshooting of the limit switch can often solve the problem. Always prioritize safety and precision when inspecting electrical components.
If you’re in Mission Viejo or nearby and need help diagnosing or fixing garage door issues, the experts at Royale Garage Door Service, Inc. are just a call away. We provide professional garage door troubleshooting, repair, and upgrades tailored to your system.
End Note
Royale Garage Door Service, Inc. is your trusted garage door partner in Mission Viejo and surrounding areas. Whether you’re dealing with a faulty limit switch or other garage opener issues, our trained technicians offer comprehensive repair services that are efficient, reliable, and affordable.
We also specialize in garage door installation, preventative maintenance, and expert recommendations. Our dedicated team will ensure your system is operating safely and efficiently.
Learn more, explore current deals, or see what our customers are saying. For fast assistance, contact us or get a quote. Follow us on Facebook to stay updated on the latest tips.
Royale Garage Door Service
23956 Juaneno Dr.
Mission Viejo, CA. 92691
+19494567539