How Garage Door Maintenance Services Impact Home Value
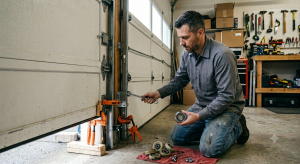
A garage door is one of the largest and most-used features on a home’s exterior, and its condition is directly tied to the property’s market value. Buyers, appraisers, and real estate agents all take note of how a garage door looks and performs, and a neglected door raises immediate concerns about the property’s overall upkeep. Consistent garage door maintenance protects that value by keeping the door functional, visually appealing, and