A garage door remote control lets homeowners open and close the door with a simple button press, making everyday access more convenient. When a garage door remote stops responding or a new remote needs to be paired with the opener, the system must be programmed so the signals match.
This guide explains how to program a garage door remote control, what happens during the pairing process, and what homeowners can review before scheduling professional service. Understanding how the remote communicates with the opener can help identify common causes when a garage door remote fails to respond.
Why Won’t My Garage Door Remote Respond to Programming?
A garage door remote control may fail to pair with the opener when signal transmission problems, opener memory limits, or incorrect device settings interfere with the programming process.
Common conditions that can prevent the remote from connecting include:
- Weak power from the remote batteries is reducing signal strength during pairing attempts.
- Incorrect programming timing prevents the opener from recognizing the remote signal.
- Stored remotes fill the opener’s memory, potentially blocking new remote connections.
- Physical wear inside the remote control affects button response or signal transmission.
- Signal interference from nearby electronics is disrupting communication between the remote and opener.
To understand how signal interruptions and memory limits affect pairing, read our guide on Why Is My Garage Door Remote Control Not Programming?, which explains common causes when a remote fails to connect with the opener system.

Step-by-Step Guide to Program Garage Door Remote
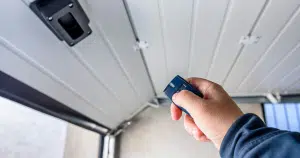
Step 1: Locate the Garage Door Opener Learn Button
Programming a remote begins by identifying the control point inside the opener that activates pairing mode.
Look for these placement clues:
- Ceiling-mounted opener housing often hides the learn button behind a light cover.
- Control panels near the wiring terminals may include the programming switch.
- Some opener designs place the button beside the antenna wire.
- Color-coded buttons help identify programming functions on newer openers.
- The nearby indicator light typically flashes once pairing mode activates.
As specified by the Chamberlain Group, the learn button is typically located above the antenna wire hanging from the opener motor or beneath the light cover on the unit.
Step 2: Clear Previous Remote Pairings if Necessary
Stored remotes inside the opener memory can prevent new signals from being accepted during programming.
Several signs indicate memory clearing may be required:
- Full remote memory inside the door opener unit blocks new programming attempts.
- Repeated pairing attempts fail even though the remote battery is new.
- Previously connected remotes continue operating while new ones do not.
- Opener lights flash, but the remote signal never registers.
- Manual instructions reference clearing stored remote signals.
Clearing stored signals allows the opener to accept a new remote and restore normal communication, which is often addressed during garage door opener service.
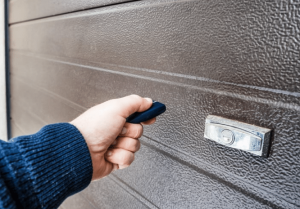
Step 3: Press and Hold the Remote Button for Programming
Pairing begins after the opener enters programming mode and the remote sends a signal that the system can store for future activation.
Common actions during this stage include:
- Pressing the remote button while the opener remains in programming mode.
- Holding the button until the opener light responds.
- Watch the indicator light for a blink or click confirmation.
- Releasing the button after the opener accepts the signal.
- Repeating the pairing attempt if the first signal does not register.
According to Chamberlain, pressing the remote button during programming sends a rolling code that the opener stores, allowing the garage door remote control to operate the opener later.
Step 4: Test the Remote to Confirm Successful Pairing
Testing verifies whether the opener accepted the remote signal and stored it correctly.
Several quick checks confirm the remote connection:
- Press the remote button once to activate the opener.
- Observe whether the garage door begins moving immediately.
- Confirm the opener light flashes during activation.
- Check that wall controls and keypad inputs still operate normally.
- Repeat the test from inside and outside the garage.
Consistent response during testing confirms proper programming and helps prevent issues that often require garage door repair.
Step 5: Repeat the Process for Additional Remotes
Additional remotes can be paired with the opener, allowing multiple users to operate the garage door.
Programming extra remotes usually involves repeating the same process:
- Press the learn button again to reopen pairing mode.
- Pair each garage door remote individually.
- Confirm each remote activates the opener before programming another.
- Store spare remotes away from extreme heat or moisture.
- Label the remotes if several doors are connected to a single opener.
Adding extra remotes expands access for household members while keeping the opener memory organized for each connected device.
Understanding How a Garage Door Remote Control Communicates With the Opener
Wireless signals allow a garage door remote control to send commands to the garage door opener, which receives the transmission and activates the motor that moves the door.
Key elements that make this communication possible include:
- Radio frequency signals that transmit commands from the remote control to the opener receiver.
- Rolling code encryption that changes the signal each time the remote is used to prevent unauthorized access.
- The receiver hardware inside the opener that recognizes programmed remote signals.
- Indicator lights or response clicks confirming that the opener has received the remote signal.
- Integrated sensors and safety systems that confirm the door path is unobstructed before movement begins.
Reliable signal communication between the remote and opener allows the system to activate the door motor and lifting system, which are key functions of modern overhead doors used in residential garages.

When to Reset a Garage Door Opener Remote
Resetting the opener may be necessary when stored signals or system changes prevent a garage door remote control from pairing with the opener.
Situations that often require resetting the opener include:
- Memory limits inside the opener are preventing new remotes from being added.
- Lost or stolen remotes that should be removed from the opener memory.
- Programming failures that occur even after multiple pairing attempts.
- System upgrades or remote replacements that create signal conflicts.
- Changes to opener settings affecting remote communication.
Signal interruptions and memory limits can block pairing, as explained in our guide on How Do I Reset a Garage Door Remote Control?, which outlines when resetting the opener becomes necessary.
Why a Garage Door Remote May Not Work After Programming
A garage door remote control may fail after programming if signal, power, or hardware issues interrupt communication with the opener.
Common causes include:
- A low or depleted garage door remote battery reduces signal strength.
- Memory errors in the opener are preventing the system from recognizing the remote.
- Wireless interference from nearby electronic devices.
- Worn remote control buttons are affecting signal transmission.
- Receiver issues inside the garage door opener are blocking the signal.
Identifying these issues helps explain why a garage door remote control may still fail after programming and when further inspection may be required.
Programming a Smart Garage Door Opener With Mobile Devices
Mobile connectivity allows a garage door opener to connect to a smartphone, so homeowners can operate the door remotely.
Key steps typically involved include:
- Installing the manufacturer’s mobile app used to manage opener controls.
- Connecting the opener to a home Wi-Fi network to transmit remote commands.
- Linking the opener with the mobile device through the in-app setup process.
- Granting user access permissions for household members who need entry control.
- Testing mobile commands to confirm the opener responds through the app.
The Chamberlain Group explains that connecting a myQ Wi-Fi garage door opener to a home network through the mobile app allows the opener to receive remote commands from a smartphone.
When to Replace a Garage Door Remote Control
Replacing a garage door remote control may become necessary when the device no longer communicates reliably with the opener or fails to respond during programming.
Situations that often indicate replacement may be needed include:
- Buttons that stop responding or require repeated presses to activate the opener.
- Physical damage to the remote control can affect its internal electronics.
- Frequent signal loss even after replacing the remote batteries.
- Compatibility problems with newer opener technology.
- Repeated programming failures despite correct pairing attempts.
Persistent signal loss or repeated programming failures may indicate that the remote has reached the end of its service life, as explained in our guide on How to Replace a Garage Door Remote Control, which outlines when replacement becomes necessary.
Learn How to Program a Garage Door Remote Control in Mission Viejo
Knowing how to program a garage door remote control helps restore access when a remote stops responding or when a new remote needs to be paired with the opener. Understanding how signals connect with the opener system and when resetting may be required can help homeowners recognize common issues before scheduling service.
Royale Garage Door Service provides professional garage door support for homeowners in Mission Viejo, CA, including remote programming, opener troubleshooting, and system upgrades. If your garage door remote control is not responding or you need help pairing a new remote with your opener, contact us or give us a call today to schedule a professional garage door service visit.